In principle, anything can be repaired, even a completely soft-treaded deck. As a repair novice, however, you should perhaps first try your hand at smaller holes or manageable nose repairs. You shouldn't expect a professional-looking result at first, as perfect filling and varnishing require even more practice than laminating. However, here are the most important tips to ensure that the repair area is sealed and stable. We have also looked at the typical damage to a fin and show the best methods for medium-sized laminate damage.
The 9 most important tips for all laminating work
- Mix the epoxy resin as precisely as possible, but do not mix too small quantities (> 50 grams of resin plus hardener).
- Mix the resin thoroughly, but do not foam it up wildly.
- Apply a thin (!) coat of resin to each repair area before applying the fabric.
- Always laminate sparingly with resin, the structure of the fabric should remain recognisable.
- Grind away as little "healthy" material around it as possible.
- Sand the side transition into the existing laminate as flat as possible for a good connection.
- Remove the ventilation screw and bring the board to room temperature around 20 degrees one day beforehand, then no more temperature fluctuations.
- If it is soft under a crack, fill it with thickened resin, for example, before laminating.
- Don't forget good ventilation, gloves (vinyl, nitrile), safety goggles and a dust mask. Good luck!
Repair fins
You do need a few other resources, but the amount of material required remains manageable - because no machines are necessary: Epoxy resin, digital scales, mixing cup, stirring rod, disposable gloves (nitrile or vinyl, no latex), barbecue charcoal, carbon fabric, carbon roving, very short cut carbon, adhesive tape, a very thin cutting disc (Dremel) or key file, sanding pad (in this case Plexiglas), wet sandpaper 180, 280, 400 and 800. Fin builder Michael Still from MS Fins has sworn by Scotch tape as a repair aid for some time because it makes release agents superfluous. The transparent film does not form a real bond with the resin and can be easily removed after curing.
Repairing the leading edge of the fin


Repairing damage to the thicker front edge (Fig. 4 + 5 right-hand side) is easier than repairing damage to the delicate rear edge (Fig. 2 + 3 right-hand side). The profile is masked on one side with adhesive tape (covering the damaged area). The damaged area (from the other side) is then wetted thinly with resin and then filled with resin thickened with finely grated charcoal on the adhesive tape. If the damage was more extensive, carbon fibres (cut very short) can also be added. The repair area is then also fixed from above with adhesive tape (4, right). The next day, the adhesive strips can be removed and the excess resin sanded off. If necessary, the area is wetted again with a little resin and finally sanded the following day. "I sand fin surfaces with 400 to 800-grit wet sandpaper and the Plexiglas plate as a sanding aid," reveals the fin expert. "And the sanding result can be optimally checked with a damp surface and backlighting."
Repairing the trailing edge of the fin
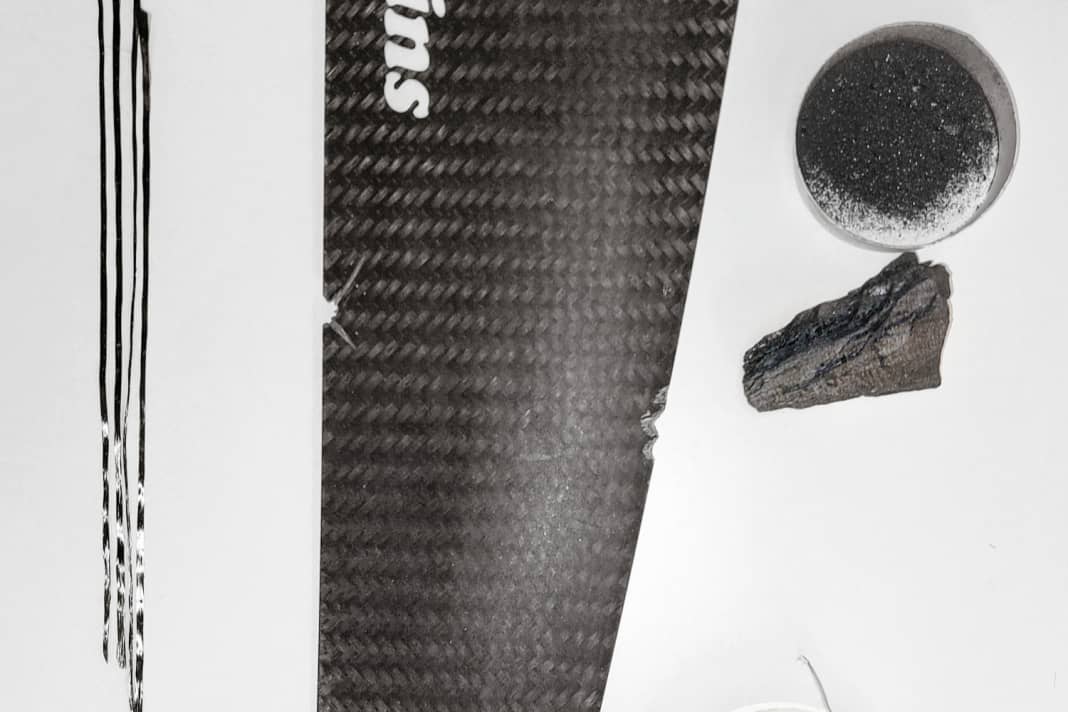


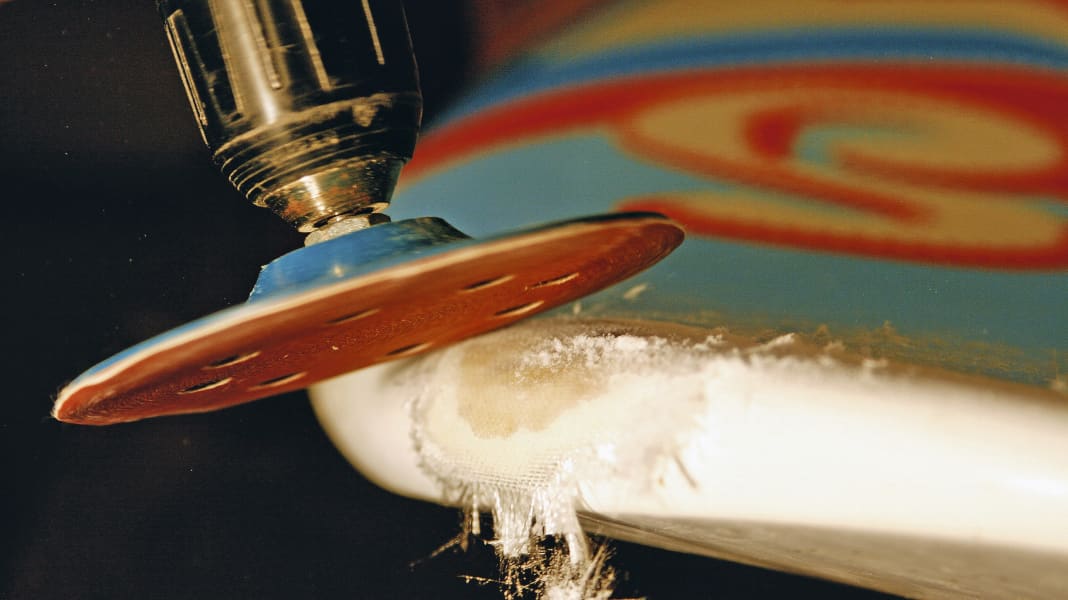
Because the gap to be filled is very thin, Michael also connects this area to the fin using fine carbon fibres. To do this, the surface of the fin next to the damaged area is slightly notched on both sides with the cutting disc (image 1, right), wetted with resin and then the carbon fibres are inserted and fixed in place with adhesive tape (2, right). The fin is turned over, the area is filled with the resin/charcoal mixture (4) and this side is then also covered with carbon fibres in the notches and fixed with adhesive tape. The next day, the adhesive strips can be removed, the area sanded and, if necessary, brushed with resin again and sanded even more beautifully (5).
Repair fin tip
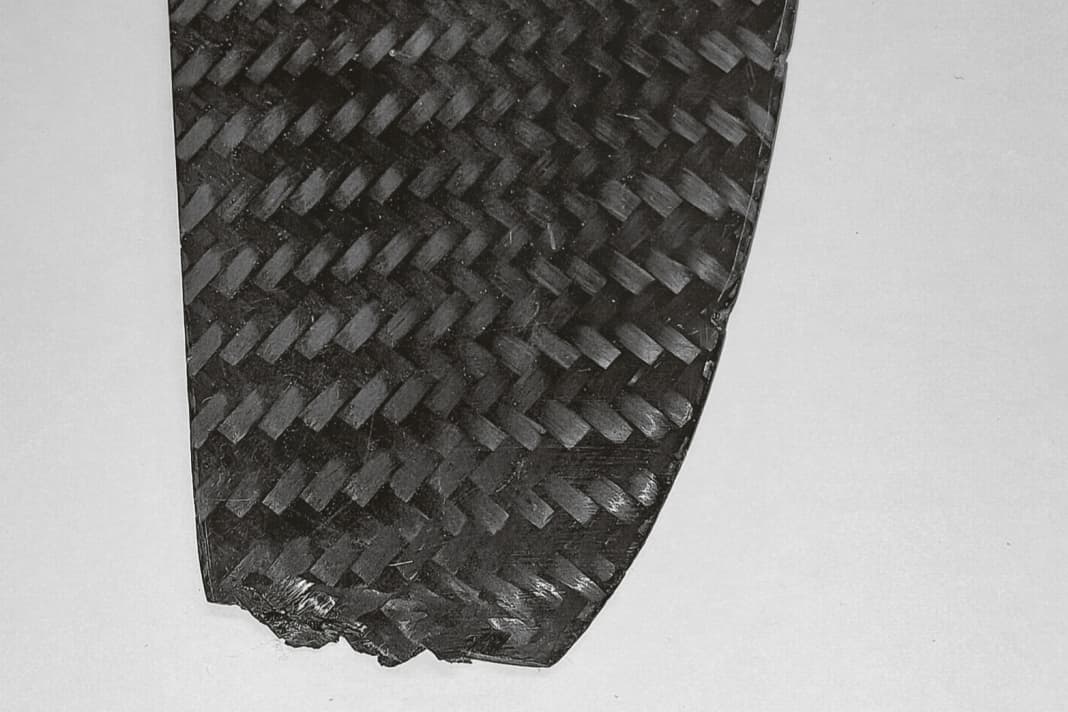


The broken fin is sanded on both sides with a strong taper and then, supported by two wooden sticks on a wide adhesive film, a layer of 160-gram carbon fibre is re-laminated onto the sanded area in a 45-degree fibre direction. The entire process takes place in a single pass: the filling between the two carbon layers consists of a mixture of resin with short-cut carbon fibres. Very short-cut fibres are stirred well in the resin, causing them to stick together and interlock. The 160 gram fabric is then laminated overlapping onto the sanded area and sealed with tape. The following day you can sand as with the other repairs.
Laminate repair on the board - classic or arthroscopic


Epoxy resin is used for all repairs; polyester resin would dissolve a polystyrene core. Fast-curing 5-minute epoxy resin from the DIY store is only suitable for temporary spot repairs. Slow-curing laminating resin is used for permanent repairs. This makes the cured laminate harder and tougher and gives you significantly more time to work with it. Online suppliers often have the complete range you need, from brushes and various fabrics to laminating resin, such as hp-textiles.com. Small quantities of a suitable resin system are available there for less than ten euros.
The basis for a successful repair is already laid during the preparation of the repair site. There are three goals to aim for with every repair:
- a solid downward support
- a stable laminate at the same level as the surrounding laminate - i.e. without laminating a hump
- a good connection to the surrounding laminate.
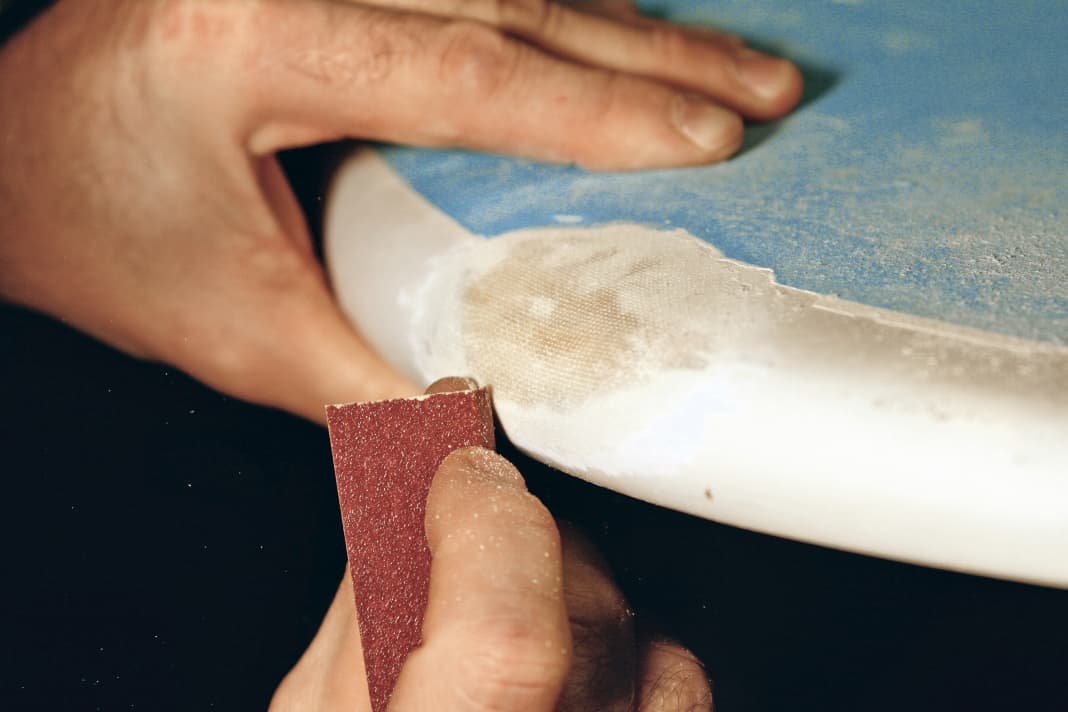
The repair area prepared for lamination therefore ideally has the cross-sectional profile of a saucer with an extremely flat edge. Depending on the thickness of the surrounding laminate, the trick here is to sand so flat and carefully that an overlap of old and new material remains after the final sanding. This is easier with a thick PVC sandwich than with a thin glass laminate.
In picture 3 above, you can clearly see how repair professional Oliver Schott has sanded the laminate flat and at an angle inwards all the way round the damaged area in the board (the white area where the new laminate is soaked in resin). This is where the actual connection to the laminate is made all round. Any cavities under the damaged area are filled with thickened resin before laminating (photos below). Special fillers ("microballoons") are suitable for thickening, which thicken the resin to a low weight mass that can be filled and later sanded easily. For final lamination (Figs. 2 to 4 above), a temperature of around 20 degrees is advisable; the curing time is then around 24 hours. The repair area is first wetted with a thin layer of resin (2), then three to four layers of 120 gram glass fabric are applied dry and brushed sparingly with resin (3) until the glass fabric becomes transparent. The new laminate now covers the hole and the sanded edge area (4) and is fixed to the side with tape. The next day, the dry edge can be cut off with scissors or a cutter knife (5) and is ready for sanding. You can start with coarse 80-grit or 120-grit sandpaper to sand the transition from the old to the new material, then continue with finer sandpaper (approx. 240-grit) (6). The repair is now waterproof, but not yet really chic. For a good finish, fine levelling with ready-to-use filler, for example (M2 surf filler), then fine sanding with 400 and 600 grit sandpaper. One-component spray paints from ten euros are suitable for painting, while two-component paints from around 24 euros are more durable, although they can only be used for 24 hours after activation. Some manufacturers provide the RAL colour code on their websites, which can be used to mix the right colour.
New: arthroscopic intervention in the board
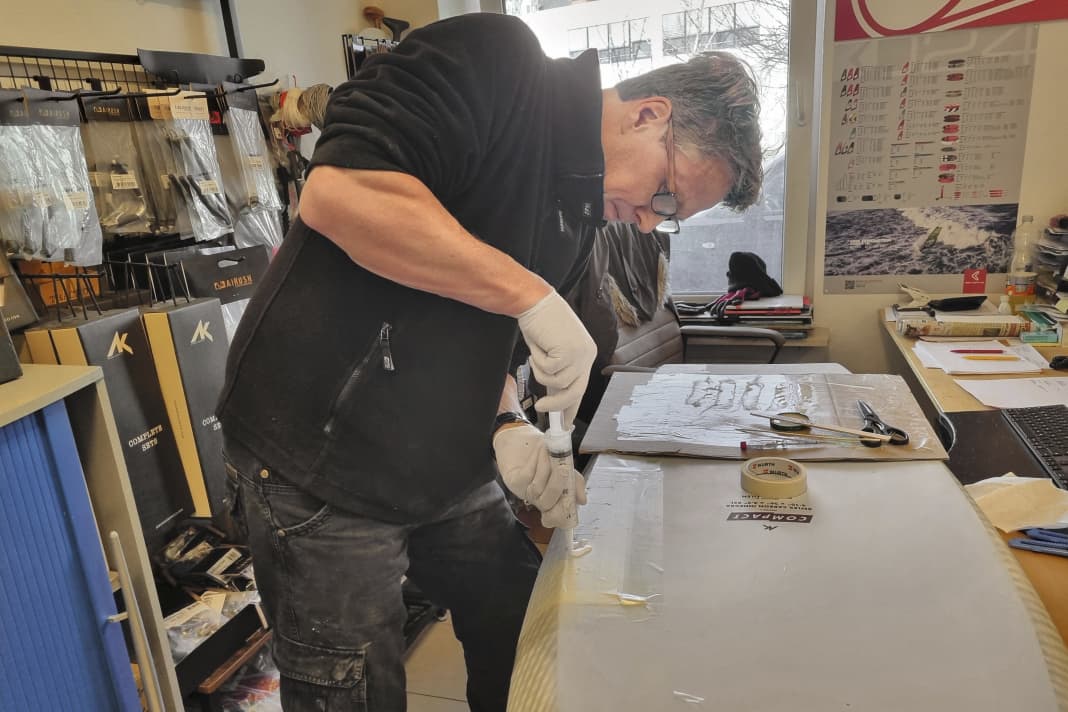


Sven Grunwald demonstrates an interesting alternative to sanding away large areas. His approach: "When grinding away, the repair area often becomes unnecessarily large and it is more difficult to achieve a nice finish." Just as modern surgical techniques no longer involve cutting open the entire shoulder, Sven operates through small holes and stabilises the damaged area through the keyhole, so to speak: "It's important to get stability under the broken laminate. I achieve this by using thickened resin and, above all, glass fibre, which I push through the holes under the original laminate with a stick." Cracks often occur when hitting the edge parallel to the rail - as with the foil board in the picture gallery above. Sven first injects resin thickened with filler through three small holes in the crack and then stuffs narrow strips of resin-soaked fibreglass under the laminate, if possible also on the sides. The same method is used for windsurf boards. After a catapult, the laminate has collapsed parallel to the rail in a very similar way. With this minimally invasive repair, Sven is able to preserve the glossy painted rail. Only the underside is drilled and filled. The laminate is fixed flat during the curing process using a screw clamp and an intermediate metal plate. After curing, the repair area can be sanded, filled and then painted matt white. Resin thickened with filler or ready-to-use filler such as M2 epoxy filler is suitable for levelling.
Repair base plate
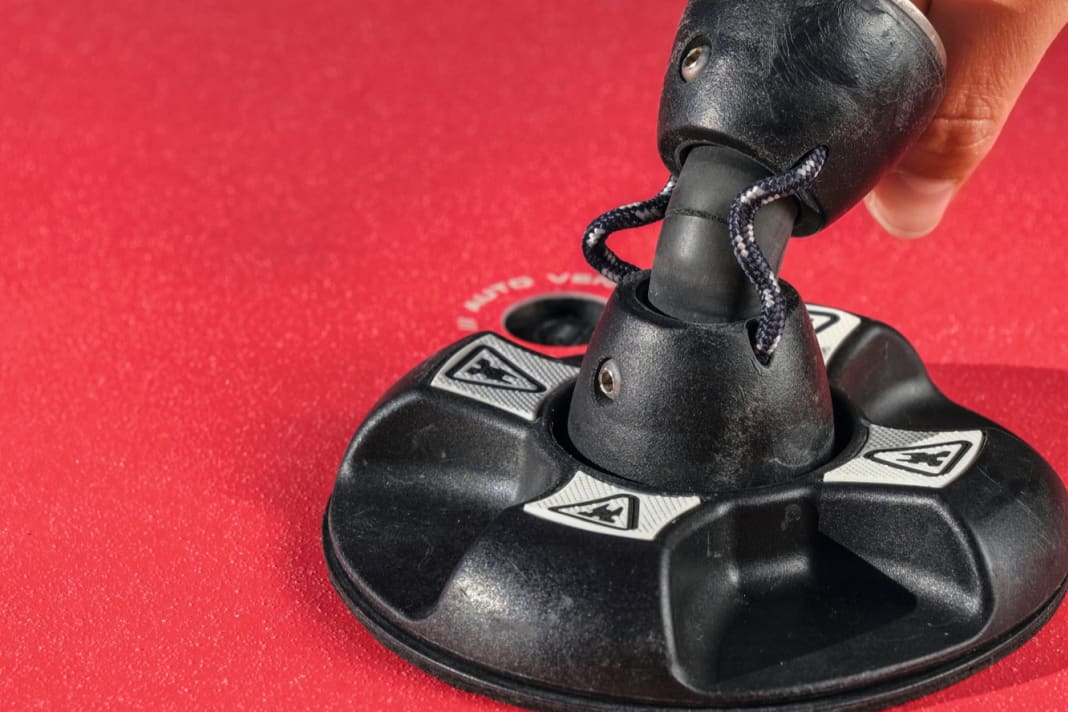


The base plate is a real Achilles tendon of any surfing equipment. Due to mechanical stress and UV exposure, the rubber becomes brittle with increasing age and, in unfavourable cases, tears at the wrong time on the water. As with winter tyres, the gradually evaporating plasticiser has a built-in expiry date. However, the failure is usually signalled beforehand by visible, small cracks when bending. Or - rather treacherous because it is invisible from the outside - the crack starts at the hole through which the tendon is screwed. "Two to five years, it depends," says surf tester Christian Winderlich from the Norderney surf school, estimating the average lifespan of a tendon - as the tendons are often referred to in the trade. According to the ADAC, even winter tyres lose some of their winter suitability after six years, regardless of the residual tread, because the rubber no longer remains soft enough at low temperatures. surf tester Manuel Vogel therefore advises checking the tendon once a year before the winter surfing season.
The base plate can be dismantled in a few minutes using two Allen keys and the sleeve can be carefully knocked out. If the Tendon is still in perfect condition, this provides a reassuring feeling. A drop of threadlocker when reassembling can't do any harm, but only use medium-strength adhesive, otherwise this was probably the last inspection. We swapped the tendon for a transparent model. Experience has shown that black tendons are often slightly softer than the transparent or white models and are therefore more comfortable to handle. Replacement tendons are available in every windsurfing shop - locally or by mail order - and cost between 15 and 25 euros.
Also interesting:
- Repairing windsurfing sails correctly - here's how it's done
- Build your own surfboard - from computer design to your first turn in the wave in 40 hours
- Renew non skid paint on windsurf boards - no more slippery decks
- These are the best materials for a quick board repair
- Repairing windsurf boards - all the tips in the workshop
- How to repair your carbon fin
