Gliding is an addiction, and for many windsurfers, the first gliding experience is the moment when they finally fall in love with this sport. Two different factors are crucial for turning a leisurely chug into a weightless glide. Firstly, the right equipment settings and secondly, the right technique. Before you hit the water, here's everything you need to know about the right board and the right strap positions. The same applies here: it doesn't have to be the latest thing, it just depends on the right settings.
We will give you all the tips below. You'll find another video tutorial below. Have fun with it!
Board type & loop positions
If you want to practise loop surfing, you need a board with enough volume. A rough rule of thumb is:
Body weight + 60 = recommended minimum volume of the board
Choosing the right board size is at least as important as choosing the right board type, as this is the only way to ensure that the loop positions required for practising can be set at all.
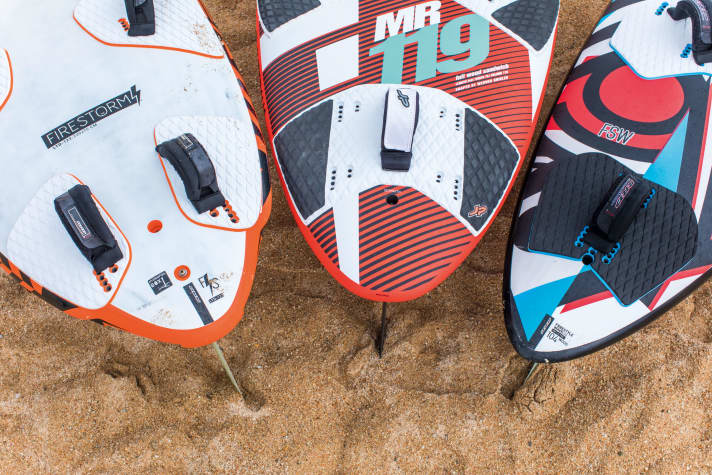
The foot straps are screwed into the designated threads, the "plugs". Depending on the board type, there are different plug series to choose from. As a general rule: For beginners to strap surfing, the straps should be mounted on a row of plugs as far inwards as possible, close to the centre of the board. All board classes suitable for intermediates (e.g. "Freeride" or "Freemove") offer these far inboard positions. A centre loop can often even be fitted at the rear, which means that you can manage with just three loops on deck (top, centre and right).
If, on the other hand, a board only has loop plugs very far out on the edge and completely lacks a centre position at the back (picture above, left), it is usually a very performance-oriented board type in the "freerace" or "slalom" category that is unsuitable for intermediates.
Sliding - the step into the loop
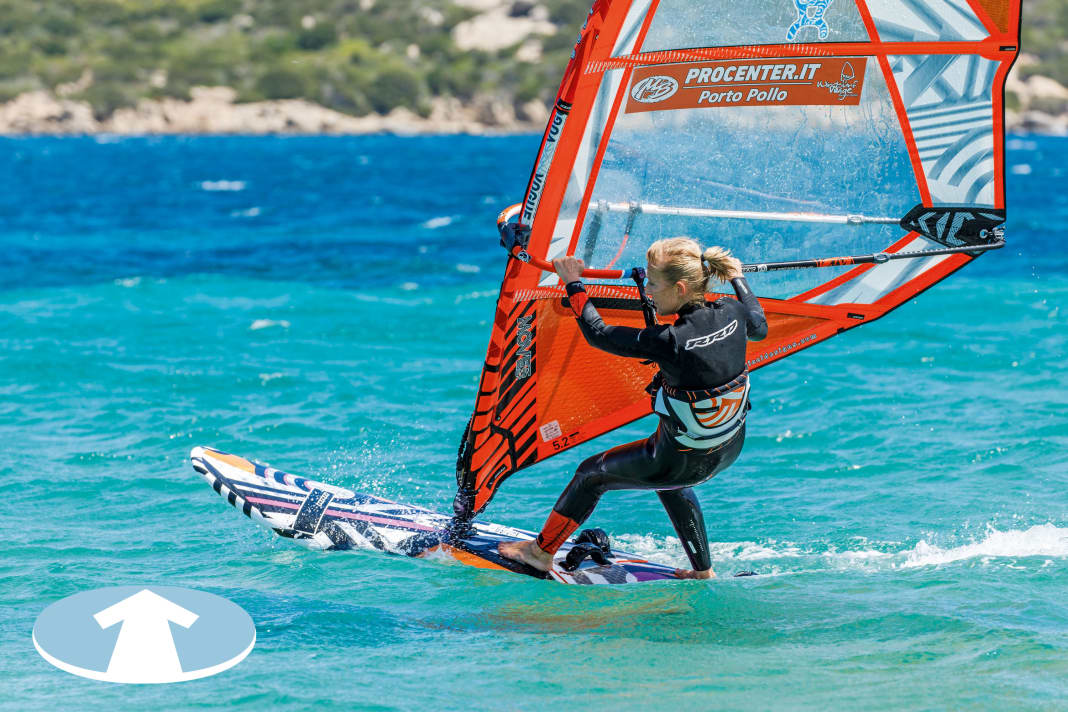


You switch to the foot straps as soon as your board switches from displacement to planing. Theoretically, you can also gain your first gliding experience without a harness, but surfing is quite tiring if the wind is strong enough. So hook yourself into the harness, turn your shoulders forwards and place your front foot slightly turned in the direction of travel between the mast foot and the front loops on deck to enable power transmission forwards (Fig. 1, above). Wait for a gust of wind and keep the board on a half-wind to light headwind course. To keep your board flat in the water when changing the front foot into the strap, you need to keep an even load on it. But how can you lift your front foot without shifting your weight to your back leg? The solution lies in the 3-leg principle: the mast is your third leg, you can exert pressure on the mast via the trapeze ramps and a slight forward lean of the upper body towards the bow (2) and load the board far forward. This weight transfer via the trapeze to the mast foot now allows you to lift the "middle" leg and place the front foot in the loop without stalling the planing by pushing the tail into the water. To begin with, you can glide along with just your front foot in the loop (3), but as soon as you feel confident, the back foot can also be placed in the loop.
The right loop size for gliding

When learning to surf with straps, it is important to be able to slip in and out easily, which is why it makes sense to adjust the straps slightly wider - at the beginning, your feet can slide in almost up to the instep. If you can step into the straps without any problems, you can gradually adjust them a little tighter to give you more control at higher speeds. If the toes are fully visible (4), this is a good compromise between support and ease of slipping in and out, even for experienced surfers.
Error analysis: My board turns to windward!
If you always turn the board with the bow into the wind when changing into the loop and the planing phase ends before it has really started, this can have various causes.
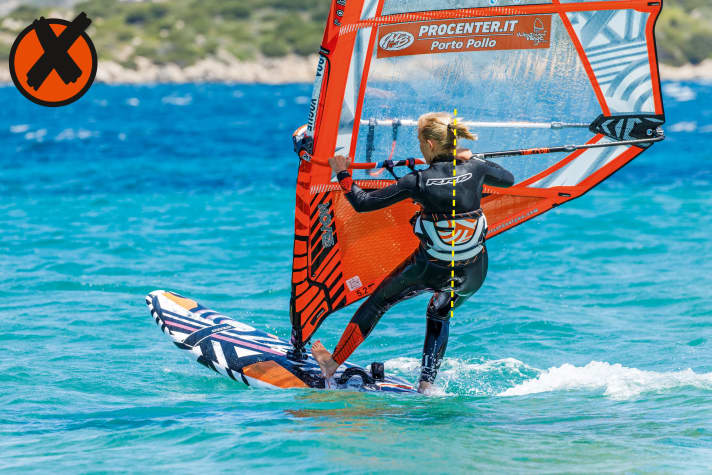
Rear loading: The most common mistake when learning loop surfing! To lift the front foot and put it into the loop, you shift your weight heavily onto the back leg, the tail sinks in, the board brakes and turns into the wind (up).
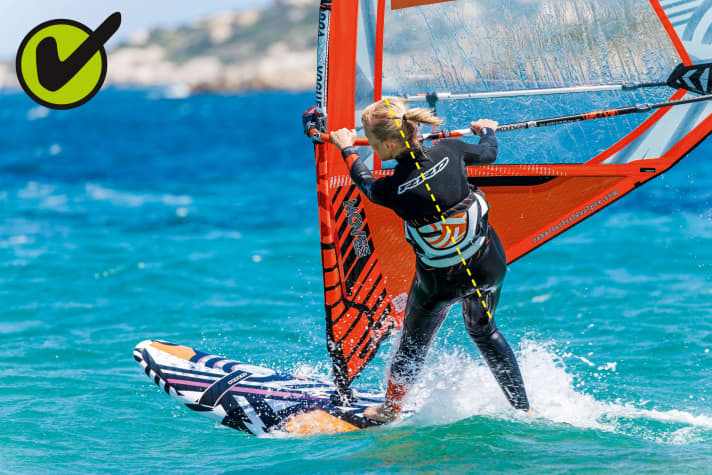
The solution: Follow the 3-leg principle! Shift your weight into the trapeze and apply pressure to the foot of the mast by moving your body slightly forwards. A high boom and long trapeze ropes are helpful. You can use the mast foot to load the board further forwards and can lift the front foot with impunity and place it in the loop.
The wrong choice of material can also make planing more difficult. If the board is too short and the tail too narrow, it will be difficult to keep the board on course at the beginning. A larger board in the "freeride" category with a wide, voluminous tail reacts less sensitively to load errors.
Finally, you can find the most important tips on gliding and harnessing in the video tutorial:
Subscribe to our YouTube channel so that you don't miss any more videos on manoeuvres and material!
