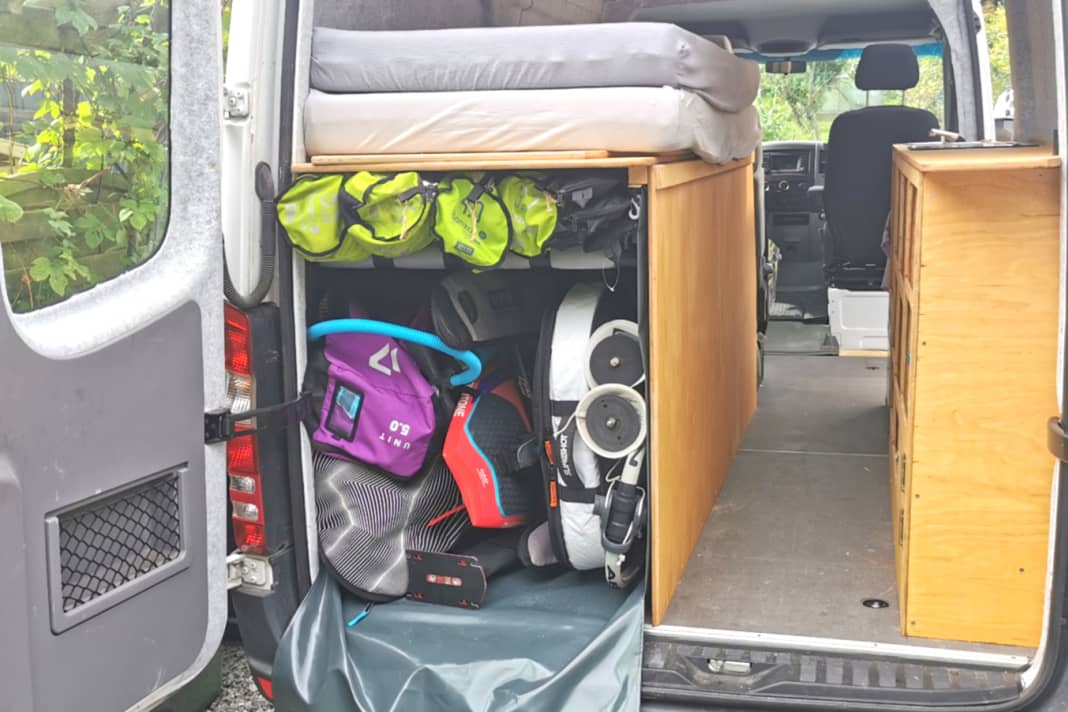
There is hardly a perfect surf bus conversion - depending on how the vehicle is used, the conversion is always a compromise between suitability for everyday use and travelling. Because the requirements and tastes are so different, the internet is full of articles and videos on the subject of campervan conversions, vanlife & co. In the end, everyone has to decide for themselves how the respective conversion is realised, depending on the vehicle, usage and, above all, budget. There are numerous tutorials on the internet for all individual steps - from underbody protection to interior conversion - which can provide much more detailed tips for surf bus conversions. However, because off-the-shelf motorhomes are often not ideally suited to the needs of surfers - there is usually no suitable board garage - this example by editor Manuel Vogel is intended to provide you with some inspiration, so that you can keep some aspects that are particularly important for surfers in mind.
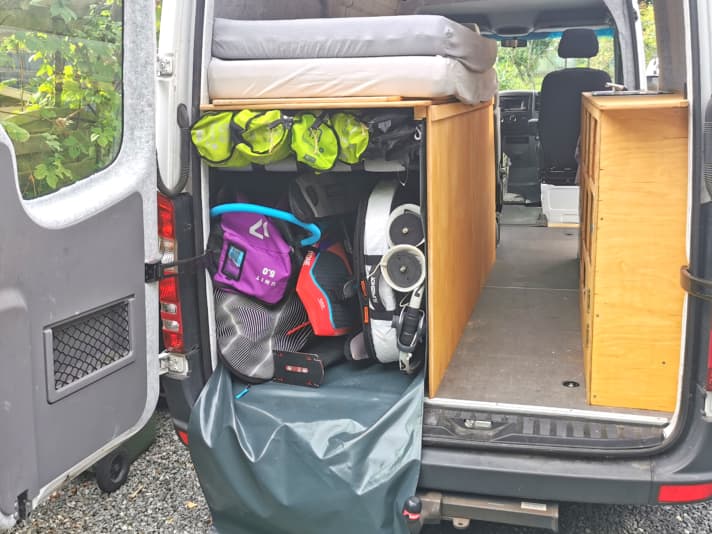
Have you also customised your surf bus and want to share your ideas with the surf community? Then send us a few photos and a short text about your conversion or a clever detailed solution to redaktion@surf-magazin.de.
The right basis for the Surfbus expansion
The question of what is the right base for an extension will probably be answered differently by every water sports enthusiast. My beloved VW T4 was still a faithful and above all robust companion for travelling to all the surf spots in the north, but as a camper for four people it had simply become too small. The fact that I chose a Mercedes Sprinter as a worthy successor was mainly due to the fact that the L2H2 version offers me, as a 1.90 metre tall man, full standing height. It is also quite compact at just under 5.90 metres in length and is under the magic 6-metre mark, exceeding which often means hefty surcharges on ferry trips and at campsites. Here are some specific tips for surfers:
1. rust protection for surf bus conversions
On all previous surf buses, I had to grind away at the rust and sometimes had a direct view of the road through the floor pan from the driver's seat. For this reason, I consulted Patrick Uecker, bodywork specialist at RustDoc in Kiel, for advice. "Many campers and self-builds," says Patrick Uecker, "are based on commercial vehicles. They often skimp on body protection and sealing for cost reasons. If you have a vehicle base for the conversion that is still in good condition, it is always worth sealing it, as most vehicles rust from the inside out. When sealing, we use a probe to apply a special penetrating grease to the sills, pillars and doors. This displaces the moisture and small rust spots are sealed airtight and preserved.
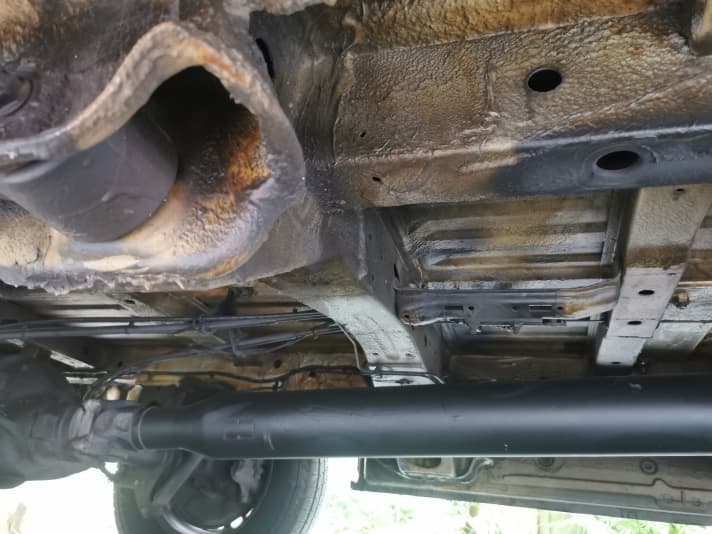
The grease also creeps into the seams, i.e. the overlaps between metal sheets, and prevents corrosion there. I often recommend a special wax for the underbody. This is heated and applied with a compressed air gun. This then hardens and creates a layer that prevents water, salt and sand from coming into contact with the sheet metal at all," says Uecker.
Vehicles often rust through from the inside to the outside. If you want to preserve the substance, you should have the bodywork sealed
The cost of such a treatment depends primarily on the size of the vehicle and starts at around 1500 euros. Those who carry out the appropriate preparatory work and remove panelling and covers themselves, for example, can also save a little. In return, the bodywork is then well protected for up to eight years. My calculation: If only one major welding job is saved over the lifetime of the vehicle, the investment is practically recouped. What's more, I don't have to think about washing the underbody after every trip to Romo or St Peter-Ording, as salt and sand hardly ever come into contact with the metal anyway.
2. heat-resistant insulation
If you don't want to barbecue in midsummer and shiver in winter, you should insulate your vehicle. The internet is full of videos and articles, some of which take very different approaches. Some make a doctoral thesis out of it, others only insulate the large areas and don't bother with the time-consuming fiddling with the bars and wheel arches. The basic rule is: where there are gaps in the insulation, cold bridges form, moisture condenses and rust can occur. But every interior design professional will confirm this: Gap-free insulation is almost impossible anyway due to the poor accessibility in the area of the doors and wheel arches - so I gave up the dream of perfect insulation relatively quickly.
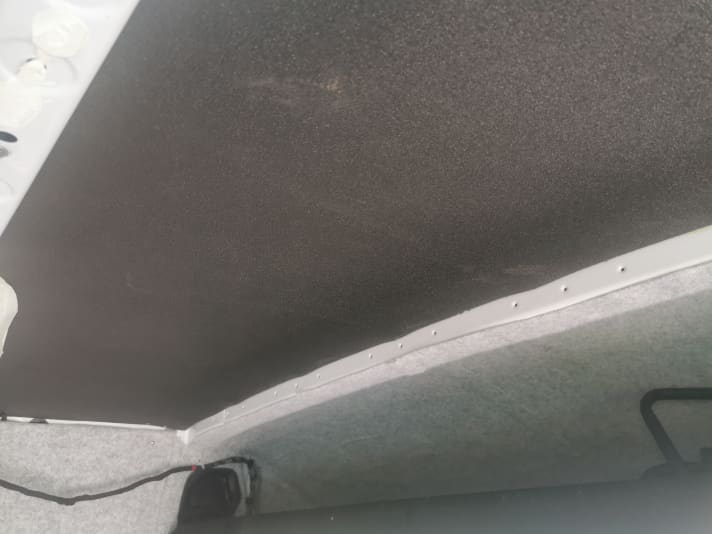
Most YouTube tutorials use Armaflex & Co, a self-adhesive material that is indeed quick and easy to work with. The fact that the adhesive is only partially heat-resistant is often not mentioned. To be on the safe side, I asked a specialist for camper conversions - Camper Mobile in Kiel. I was advised not to use self-adhesive material, especially for the roof insulation, because this insulation apparently peels off the paint in the summer heat. Instead, they recommended fixing the insulation mats with a contact adhesive (Bostik 1513), which is what I did - a tough job that will hopefully pay off in the end when travelling to surf spots in hot regions. Be sure to pay attention: Ensure good ventilation during application, the adhesive stinks to high heaven.
You have to do everything yourself (Deichkind)
At night, moisture naturally condenses on the cold sheet metal and tends to run behind the panelling and covers. For this reason, the entire interior was given a felt cover. This is either glued directly to the insulation or the panelling. To achieve a clean look, I was recommended felt with as much stretch as possible. This is sprayed on both sides with spray adhesive.
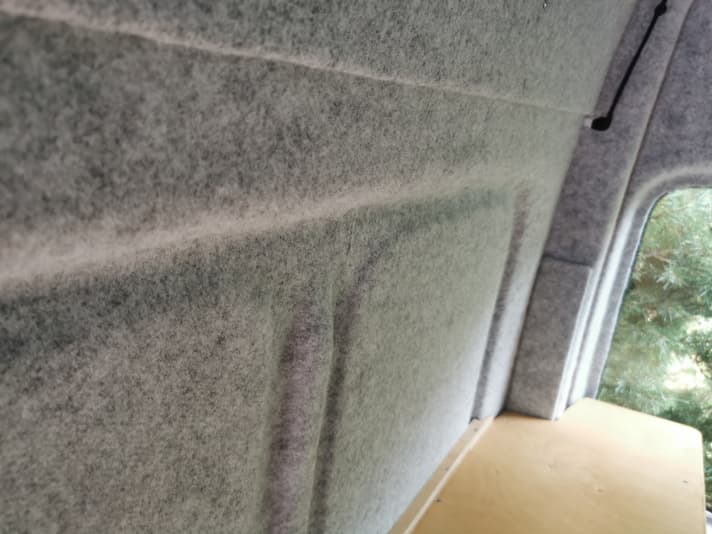
After a short flash-off phase, the felt can be applied over the entire surface and pressed into all recesses. This results in a very clean look, even on highly curved surfaces. The felt also prevents water droplets from running behind the panelling and feeding the rust there.
3rd Womo approval & bench seat - Include TÜV in surf bus conversion
In order to be able to use the surf bus as a family coach, the installation of a bench seat was planned from the outset. The position had to be worked out precisely so that there was still enough space for boards behind the bench, but not too much space at the front. If you have the bench installed by a customisation specialist, they will take care of the professional installation and usually also the TÜV issues. If you want to install the bench yourself, as is the case with me, you should make an appointment with the TÜV in advance and discuss the exact procedure so that there are no nasty surprises afterwards. According to the TÜV inspector, the bench must not be screwed through the insulation, for example; solid blocks made of metal or plywood must be inserted between the wooden panel and the base plate. From below, the steel plates should be supported by the uprights to prevent the bench from slipping. I obtained the appropriate bolts from the fitting specialist, who also cut the steel plates to size.
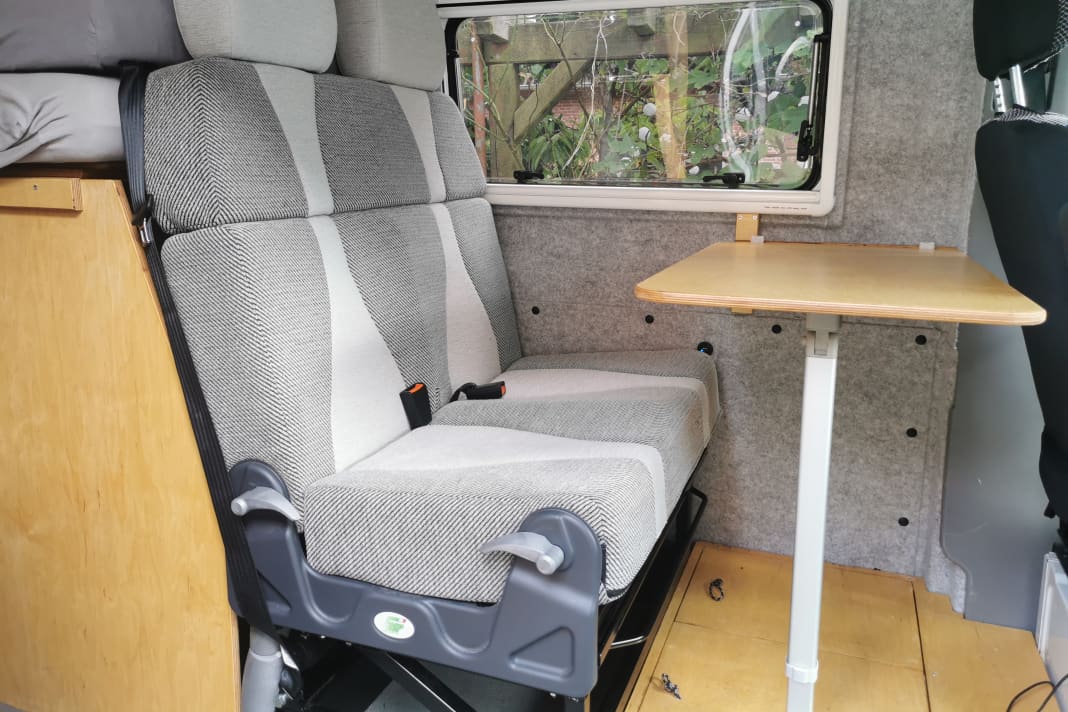


Equipped in this way, two people can sit comfortably here, and when folded down, an additional bed is created, which can be turned into an acceptable lying surface by rotating the front seats. Theoretically, surf trips with four people are now possible.
4. energy supply
The subject of electrics and power supply was my biggest weakness in terms of expertise - my colleague Oli, who is well versed in this area, was probably on the verge of blocking me as a caller seeking advice. In the end, however, the installation of the second battery, charge controller, wiring and connections went well with a little help.
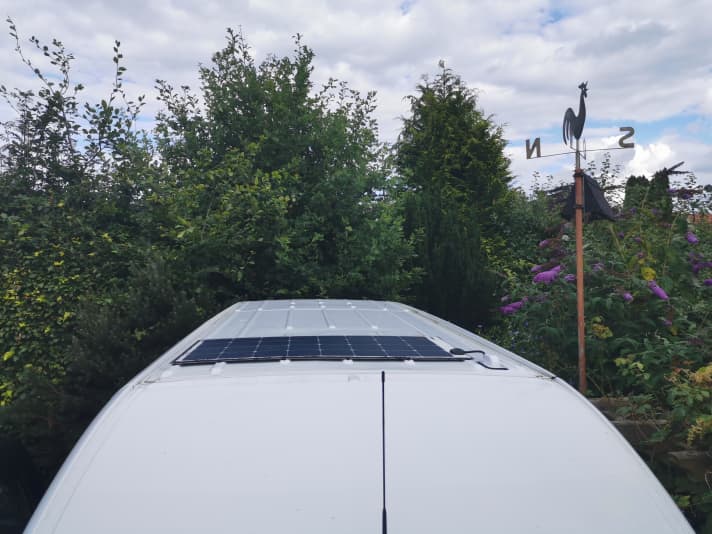
When gluing on the solar cell, I made sure that it was glued far forward so that it would not be shaded when surfboards or dack boxes were mounted on the back of the roof. There are also arguments and counter-arguments for each system with regard to the cells used. I installed a flexible 120-watt cell. On the advice of the installation professionals, I glued it to an aluminium plate, which prevents it from vibrating when driving into a headwind. For the cell to work efficiently, it should be rear-ventilated. The aluminium plate and cell were therefore glued to the raised beads of the roof. If the roof is flat, small nuts should be glued in as spacers, for example, to prevent the solar cell from resting directly on the roof. The bottom line is that I now have a system that sufficiently covers my low energy consumption (compressor fridge, light, laptop, etc.), produces no wind noise and does not cause any significant additional consumption due to its low installation height of just one centimetre.
5. board garage with wet room
Every wet sail or wetsuit brings moisture into the vehicle - and rust is happy about it. Simply packing the wet material in a roof box is a sensible solution. Personally, however, I prefer to keep my equipment in the car and then I don't have to worry so much about fuel consumption, height restrictions or long fingers. Water sports enthusiasts often go to enormous lengths to make the equipment garage in the vehicle "watertight". To prevent water from running between the floor panel and the panelling, it is often painstakingly sealed with silicone or even laminated. The problem: if there is a leak, moisture gets behind the panelling/insulation and can no longer dry out - rust then develops quickly. I thought the concept of the Kieler Sailmaker Nils Molkentinwho is a passionate windsurfer himself:


Nils took measurements and made a suitable tunnel out of waterproof tarpaulin, which I was then able to screw into my board garage with a few battens. This way, the material is enclosed in a kind of wet cell. Even smelly surf shoes find their hermetically sealed place here - the passengers are happy! If moisture does penetrate between the panelling and the floor panel, it can dry out again, as there is no need for sealing. Depending on the size, a customised tarpaulin usually costs between 250 and 400 euros. I now have space for three to four boards plus several rigs and accessories and can leave the equipment wet in the car after a long day of surfing without everything getting completely soggy. Tip: The lorry tarpaulin wet cells can also be made more elaborately with additional compartments and intermediate layers for accessories and small parts.
6. theft protection
The idea that on holiday not only your home on wheels but also - as a kind of by-catch - half your household and all your surfing equipment could end up as stolen goods makes many water sports enthusiasts break out in a cold sweat. One thing is clear: there is never absolute protection against theft, every system can be overcome by professionals with enough time. It is therefore more a question of doing more than others and minimising the effort for potential thieves.
Theft protection is more about doing more than others
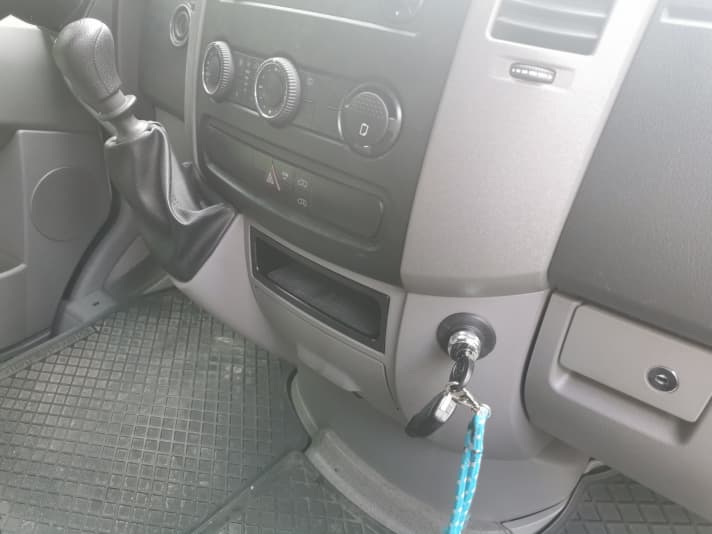
After three garages independently advised me to use a fixed gear lock, I decided in favour of a product called Bear Lock. This is permanently installed under the panelling and blocks the gearstick when reverse gear is engaged - it is almost impossible to drive away with it. According to the workshop, it cannot be drilled out and is also protected against other tricks such as icing up. However, at just over 600 euros including installation, the cost of this is not a small price to pay.
7. use moisture-resistant types of wood
I'm definitely not going to become an interior design professional in my lifetime - so my solutions are more functional than maximally chic. I will therefore spare you any half-baked tips on interior design at this point, but I would like to share my experiences regarding the types of wood I chose. My aim was not to increase the weight too much and to make the furniture as resistant to moisture as possible. The nice colleague in the wood department at Bauhaus - himself a windsurfer and surf reader - advised me to use multiplex beech or birch, as these types of wood are much more resistant to moisture than the popular poplar wood, for example.
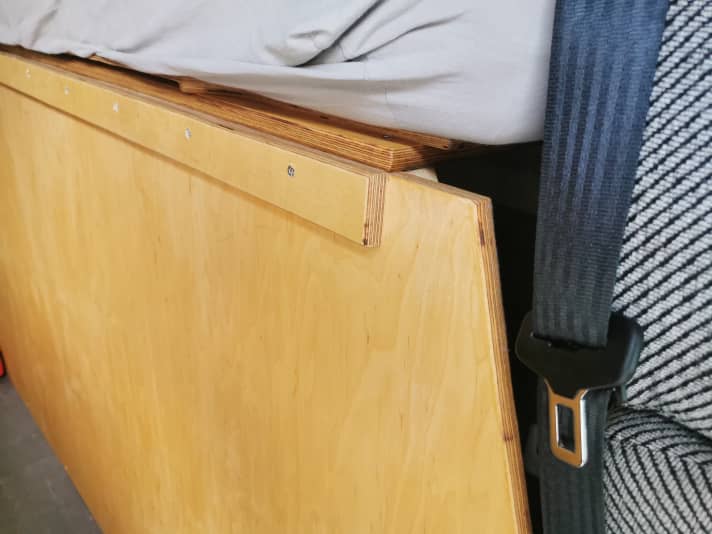
Before installation, I painted the sawn birch wood twice with a water-repellent clear varnish to prevent moisture from penetrating the wood. In particular, I carefully varnished the cut edges resting on the floor to prevent moisture from being drawn up from below, even on rainy surfing days. After a few months of work, we can now get started - just in time for the new test season in Denmark. This will show whether the expansion masterplan works out or needs to be improved again.
If you have any other ideas or tips for surfers on the topic of surf bus expansion, please share them with the community and send us an email to redaktion@surf-magazin.de
